some recent finished projects
For all the time I spend knitting and crafting, you’d think I’d end up with more to show for it. And thanks to a few delicious weekend days lately when I’ve done nothing but craft, watch TV, and catch up on This American Life podcasts, I finally do. It’s easy to forget how many unfinished knitting projects you have hanging around until you’re able to finish three in one day! Here are a few:
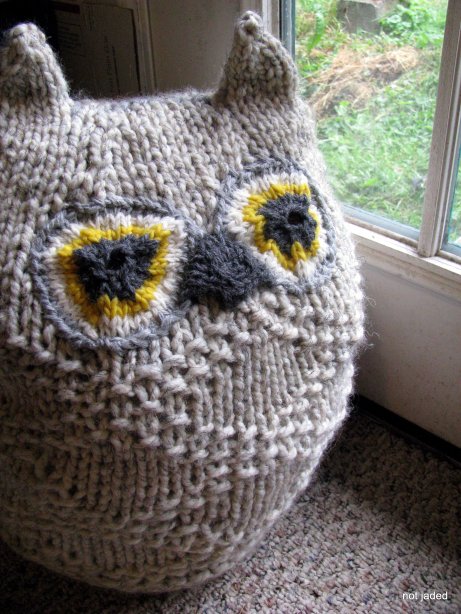
Yolanda, empress of the Snowy Owls
I have to admit, my main motivation for starting this project (Big Snowy Owl from the Purl Bee) was the fact that the finished product would be bigger than Roo. The finishing touches were painful because I only have smaller-sized DPNs and can’t justify buying bigger ones just for one project, but I’m glad I persevered. At least three members of our household (both human and canine) have fallen asleep using Yolanda as a pillow.
A goofy hat
“What’s wrong with your generation?” My dad asked recently. “All the boys have beards and goofy hats.” Never mind that there are some old pictures of him looking downright goofy in his youth! If only I had access to them at the moment… But anyway, the point of this story is that the hat that prompted this comment was Daniel’s Jayne Cobb hat, which he asked me to knit him for Christmas one year (here’s the Ravelry link, if you’re curious).
Now, the only episode of Firefly I’ve ever watched was the one where Jayne receives said hat, and that was just so that I could better knit a replica, so I wasn’t about to make myself one. But when I scored a skein each of teal and grey Lambs Pride Bulky at the Rotary Auction for a dollar, I couldn’t resist making myself a goofy hat from the same pattern. I think it will come in handy when I’m leading group hikes on gloomy days next year!
Hankies, hankies, hankies
And finally, a non-knitting project! Remember the striped fabric I scored at a yard sale and used to make a few salad spinning bags? Well, I should mention that those bags were just a secondary use for that fabric. In fact, I’ve used the bulk of it to make hankies. Lots and lots of hankies.
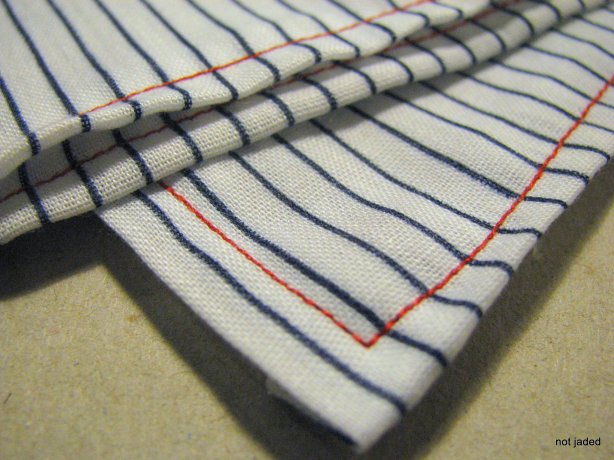
We’ve successfully weaned ourselves off paper towels and paper napkins, but were lacking in the handkerchief department. I’ve been meaning to make some for a while, but it took this year’s heinous allergy season to actually get me off my butt. And I’m so glad it did! I love how the red thread on the blue striped fabric reminds me of notebook paper, and the whole thing makes for a much classier nose-blowing experience, comparatively speaking.
Now that I’ve found the joy in finishing things, I can’t wait to tackle a few more projects. Next up? A knitting needle roll, striped wristwarmers, and this top (which I bought the yarn for even though I promised myself I wouldn’t until I finished a few more projects..) Guess I had better get started!
Wash, wash, wash your greens
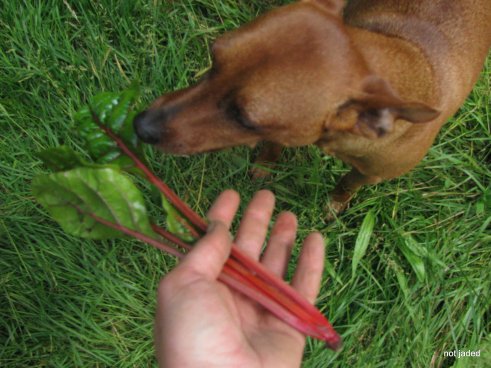
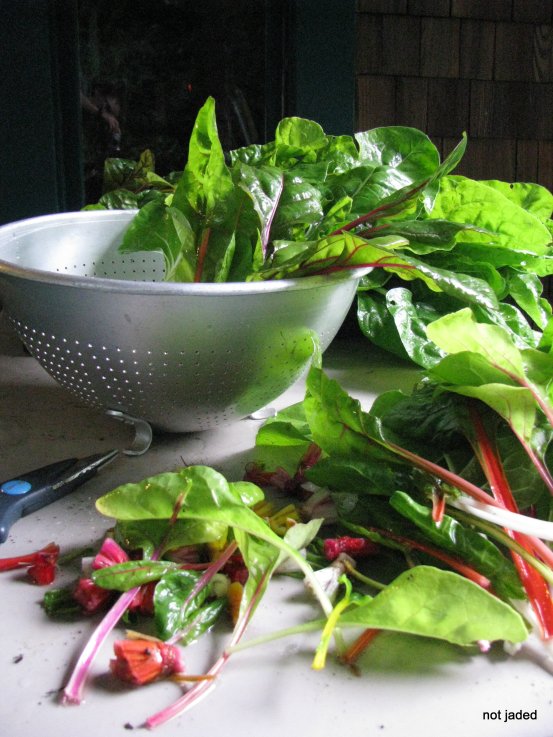 As I’ve mentioned, we have lots of greens growing in our garden. Something to the tune of 300 row feet of kale, chard, and collard greens at the moment. That’s not even counting the beet greens, which I know I should count but often guiltily feed to the chickens instead. Anyway, the point of growing all these greens is that if I can just get them picked, washed, and into my fridge (preferably also sauteed with coconut oil and lots of garlic), I have no problem eating them with almost every meal. In eggs, on pasta, in a salad, on their own, raw in smoothies, and dehydrated–there’s no shortage of ways to enjoy them!
But we process them in such quantities that my old standbys–our large mixing bowl and colander–weren’t cutting it anymore. So after a little trial and error, we came up with a new system that I love:
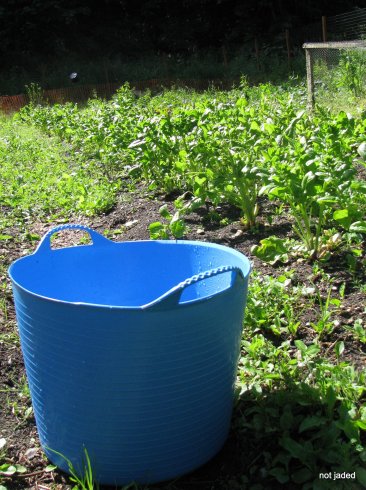
Step 1: Harvest
I hate to bring any new plastic into our lives, but we recently made an exception to purchase a Tubtrug. It’s light, portable, durable, and holds tons of veggies. It was important to me to get the real deal because I didn’t want a knock off that would break or degrade in the sun, and we chose the original type instead of the ones made from recycled plastic because the latter aren’t guaranteed food-safe. But the real reason we bought it brings me to…
Step 2: Wash
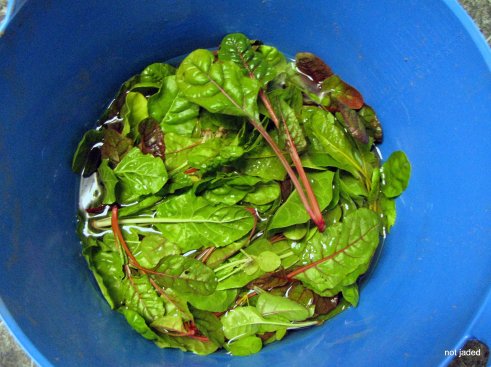
I love that we can fill the tub with water and wash the veggies right in it. With greens, I like to let them soak for a bit so any stowaway slugs head for higher ground instead of potentially finding their way to my plate! After soaking, they get a dunk, a swish, and it’s on to…
Step 3: Dry
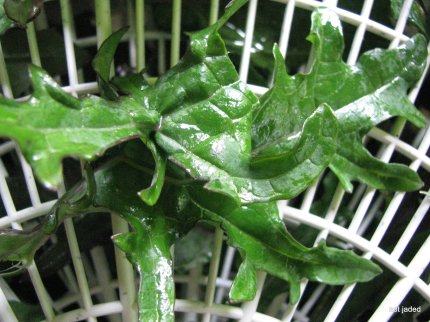
This is the part of the process I’m proudest of. For a long time I’ve wanted to get a salad spinner, but I kept striking out at yard sales or thrift stores. I couldn’t quite bring myself to buy a new one for a few reasons: the expense, the limited capacity, the thought of adding another single-use kitchen gadget to our collection (though they are useful for drying small knits!), and most of all, the plastic!
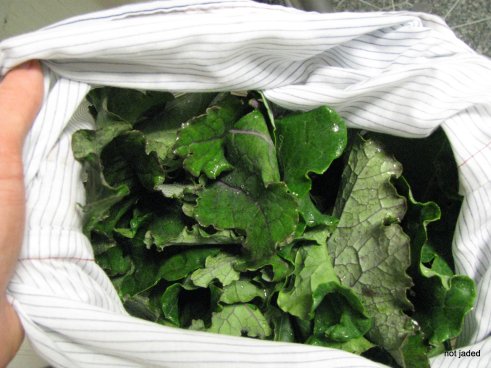
My research into plastic-free salad spinners led me to a stainless steel OXO model that was super expensive and half-plastic anyway, and a few alternate methods for drying greens. The most common of these alternate methods seemed to be filling a pillowcase with wet greens, going outside, and spinning it yourself. Aha! I’d just scored five yards of cute striped fabric for a dollar at a yard sale and have been slowly teaching myself to sew straight lines, so I whipped up a few giant drawstring bags by scaling up these ones.
Since we mostly eat greens in season, it shouldn’t be very inconvenient to have to go outside to dry them. It’s kind of fun, but you might make funny faces while doing it:

The best part? Just a few seconds of spinning and you have a whole mess of greens ready for eating!
Avoiding the oven
If I lived anywhere else in the country, I might be able to say that this post was inspired by unbearably hot weather. But I live in the Pacific Northwest, land of June gloom/Junuary and summers that don’t start until after the 4th of July. Even now, we’re regularly maxing out at 75 degrees. And on those days, the tall trees around our house keep it cool enough to keep me wearing sweaters and the occasional wooly hat.
Of course, I’ve never really been one to shy away from using the oven on a hot day. I’d rather suffer the heat than an unfulfilled chocolate chip cookie craving. If you can’t stand the heat, get out of the kitchen–just make sure you come back when the timer goes off!
But I don’t like using the oven for fussy things that require lots of attention, no matter what the weather is like. I don’t know if it’s that I’m too lazy or too distractable, but I’ve burned enough batches of granola and kale chips that I’d pretty much given up on making either. Thankfully, I’ve recently discovered that it’s possible to make them both (better!) without using the oven.
I toast nuts and seeds pretty regularly on the stovetop, where I can better monitor their progress and enjoy how wonderful they smell. And I was wistfully thinking about homemade granola the other day when it hit me–why not make that in my cast iron skillet, too? I was far from the first granola lover to think this way, and google turned up lots of helpful results. I’ve been mostly following this recipe from Dinner with Julie, but I triple it to better match the size of my skillet and our appetites. It’s a great way to use up those odds and ends of nuts, seeds, and dried fruit that accumulate in our pantry.
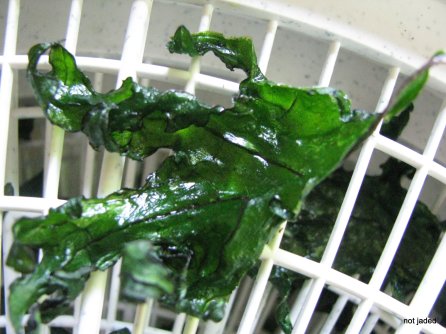
Kale chips, on the other hand, are apparently best made in the dehydrator. Not only do they retain more of their nutrients due to the lower heat, but more importantly, they are impossible to burn this way. I think they keep their crunch longer, too. I like to make several batches in a row and store them in mason jars for easy snacking later. It’s hard to believe that people pay so much for little prepackaged bags of these chips because they are so simple to make. Just tear the kale into bite-sized pieces, toss them with olive oil and salt, and dehydrate until they are crunchy and delicious! You can play around with seasonings, too. I like to add a generous dusting of nutritional yeast, and I’m working on a salt and vinegar version.
Oooh, and one last tip for those of you who really do live in places where it’s too hot to use the oven. Sometimes I like to freeze unbaked muffin batter in those silicone baking cups so that I can bake them one at a time in the toaster oven. It’s a great way to enjoy baked goods without the heat–or the temptation to eat the whole batch!
Gettin’ crafty with seed catalogs
I’ve always enjoyed looking through seed catalogs during the winter and early spring, but this year I really pored over them. I carried a stack from room to room with me like a student lugging textbooks, and even made a spreadsheet to compare prices and shipping rates between companies!
But even though I used them extensively, I still felt guilty for requesting so many. I know more and more seed companies are encouraging folks to download pdf versions of their catalogs, something I would certainly do if I had an e-reader. But since I stuck with paper, I vowed to get as much use out of them as possible and brought a bunch to the preschool where I work. Not only did the kids use the pictures to decorate paper crowns and adorable Father’s Day cards, but we also had some great conversations about gardening and vegetables.
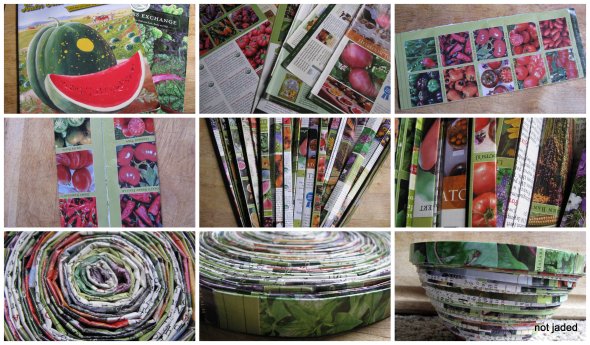
I kept the nice glossy ones for myself, though, to make some coiled magazine bowls. I mostly followed these instructions, though there are plenty of other ideas and variations all over the internet. I like to use them as catch-alls around the house and I suspect they’d make great gifts!
We have a pretty unusual waste stream around here. Food scraps are often repurposed or fed to the dogs, worms, or chickens before they reach the compost pile. Instead of regular trash pickup, we haul a trash can or two to the dump every few months. But we also take along more recycling than I’d like to admit.
I’ve been trying to cut back on the waste we generate by buying most of our food and toiletries (and beer) in bulk, but it still adds up. So lately we’ve been finding ways to repurpose some of these materials in the garden and around the farmstead. We do it because we’re broke, frugal, and environmentally conscious, but it’s had the unintended consequence of making our garden very, very hip. Not because it’s cool to be “green,” but because it is steeped in irony:
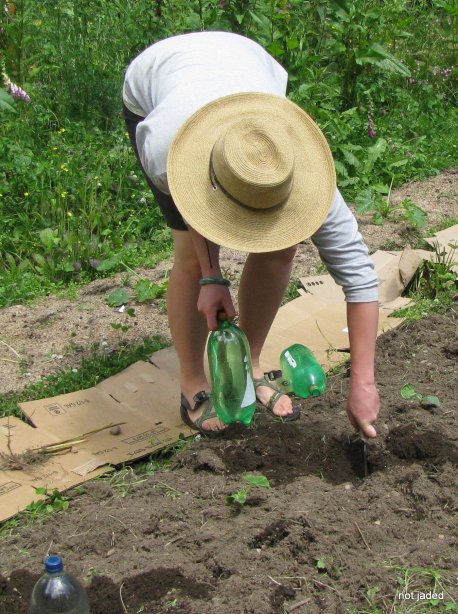
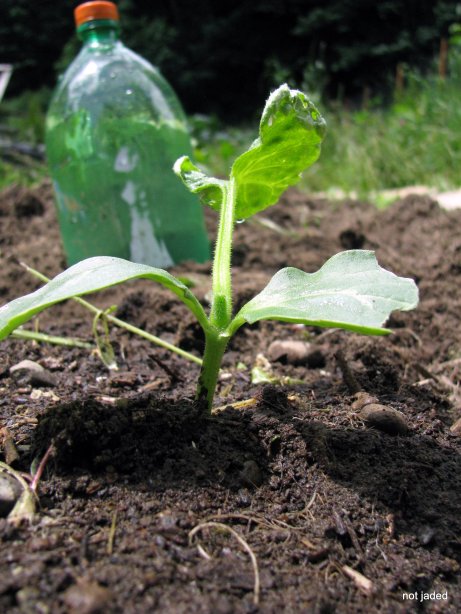
These 1- and 2-liter soda bottles used to hold high fructose corn syrup, artificial flavors, and all sorts of other junk. Now they collect solar radiation all day and slowly release it all night to keep our cucumbers warm.
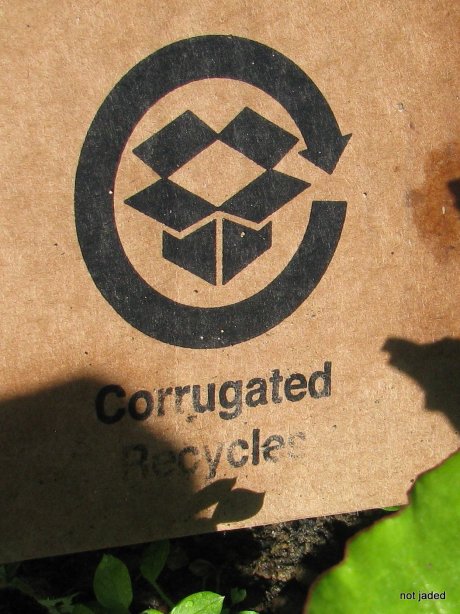
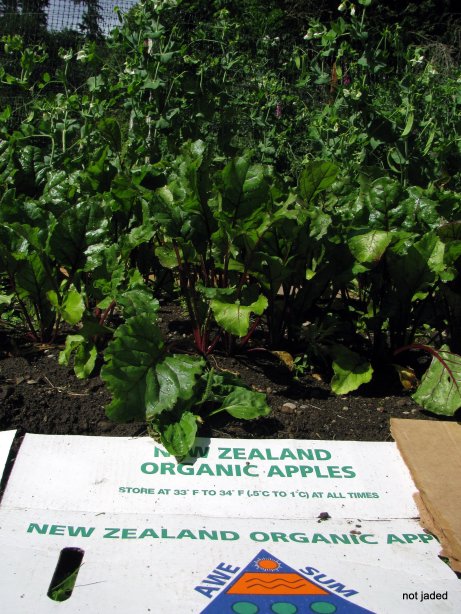
We’ve also been searching for a way to suppress weeds along the pathways between beds. I ransacked our house for cardboard, which was working well, but we didn’t have enough on hand to cover all the paths. Luckily, Daniel works at our local grocery store and was able to bring a bunch home. So we blanketed our hyper-local, organic garden with cardboard that used to house apples from New Zealand and “Florida Natural” orange juice:
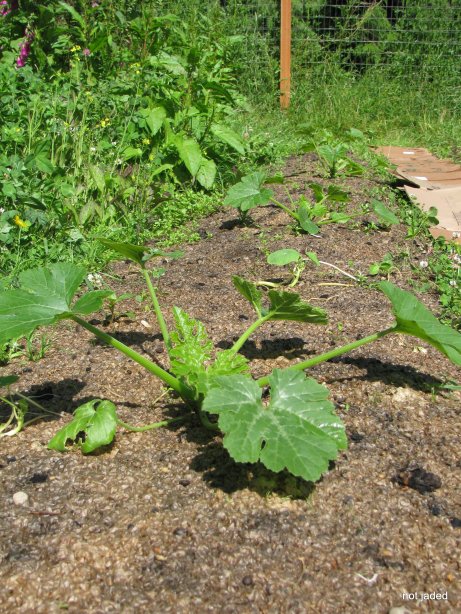
The last thing I want to mention isn’t really ironic, but I think it still gives us hipster cred. Not only do we drink lots of fair trade, shade grown coffee around here, we also sprinkle the used grounds on our garden beds to help with slug control. And recently, we scored some chaff, a byproduct of the roasting process, from our local roaster to use as mulch. It’s strangely fluffy and smells heavenly. Despite the fluffiness, it stays in place, keeping the weeds down and the water in. Our zucchini seem to be enjoying it:
Anyone else have some good ideas for reusing materials in the garden?
the swing of things
Whew! Somehow while I was busy picking up extra hours at work, waiting for the rain to stop, and entertaining houseguests, the garden (and its surrounding weeds) sprang to life. Our to-do list fills a legal pad hanging by the front door and even with all the extra daylight we rarely make much of a dent in it.
But even on days when I don’t have the time to get dirty, I can’t resist doing a walkthrough of the property to take inventory (and taste a pea or twenty). Here’s what we have going on…
…in the garden:
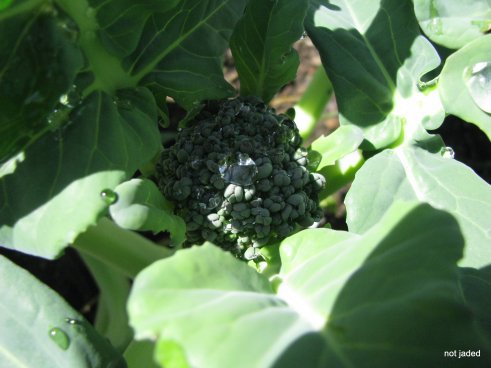
- Our first planting of broccoli is juuust starting to head. We lost three or four of the seedlings to cabbage maggots,which was particularly disappointing as these plants have been my babies from the get-go. I’m especially excited because we’re growing the open-pollinated “Umpqua” from Uprising Organics.
- Our snow and snap peas,on the other hand, are going nuts. The President’s Day peas took so long to germinate that the next planting caught up and now we’re eating peas with (and between) every meal!
- Greens are another thing we have in abundance. The first plantings of spinach and arugula have already bolted, but now there’s plenty of chard, lettuce, and kale. Expect to see some future posts about how we’ve been enjoying this bounty.
- The quinoa is also doing surprisingly well after a slow start. The seedlings were so spindly for the first month or so that I thought they wouldn’t survive transplanting, but now the plants are getting big. Some even look like they’ll be flowering soon.
- The curcubits, however, have been causing me some heartbreak. I had plans to grow tons of cool winter squash varieties, but had a terrible time trying to start the seeds. I finally got some delicata and “sweet meat” seeds to germinate, and am hoping it wasn’t too late. We’re also growing cukes and summer squash.
- The pole beans we planted are doing well, but I’m really excited about the bed of orca/calypso/ying-yang beans that finally came up. I’ve never grown dry beans before, but there are already another twelve varieties in the Seed Savers Exchange catalog that I’d like to try next year…
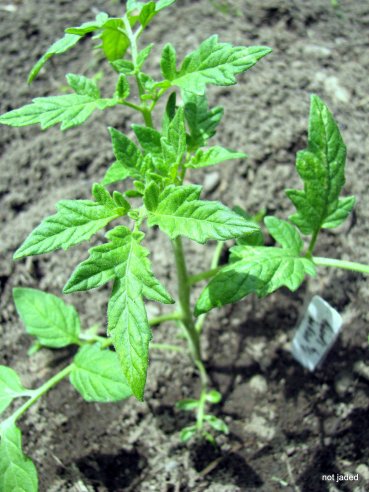
- Oh, and I can’t forget tomatoes! I’ve been dreaming of tomatoes since I saw the greenhouse on the property, so I may have gotten a little carried away with seed starting back in February. Anyway, we now have fifty plants in the greenhouse (plus a few peppers) and another fifty out in the garden. Luckily there’s a good sale on canning jars at our local supermarket, so we’ve been stocking up!
…in the menagerie:
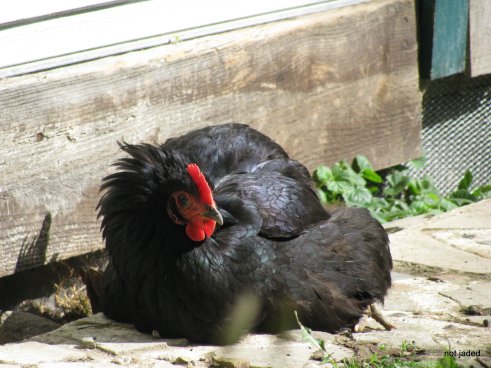
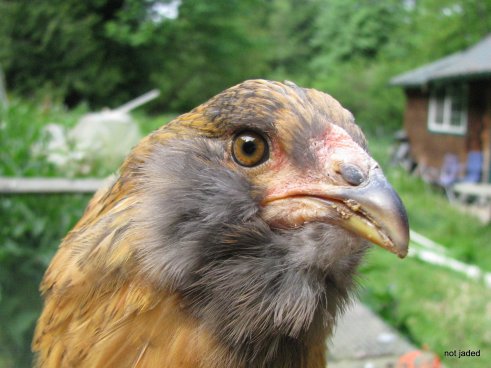
- I have some good and bad news about our chickens. I was a little too sad to post about it at the time, but a few months ago we lost Cherry and Joan to a coyote attack. At first we weren’t sure what got them because we all we could find were their feathers, but our guess was confirmed when the coyote made another attempt the next day. So for now we’re being a lot more careful about when and where we let them free range and planning a coop remodel. But on a happier note, Daniel was able to introduce the new chicks to the remaining three hens and Paul with minimal difficulty. The new girls are getting really big, and we expect them to start laying in the next month or two.
- Part of the reason the coyote has been unsuccessful lately (knock on wood!) is that we’ve made a canine additionto our farm family. Macy, like Roo, is on loan from our landlords. But unlike Roo, she’s bigger than a breadbox. So even through the chickens are still a little afraid of her, we feel better knowing she’s around.
- The worms are thriving, too. I harvested a bunch of castings–some of which gave a serious boost to my Meyer lemon tree–and changed out the bedding at the beginning of the month. The tricky part is finding food scraps to feed them without depriving the chickens!
We built an herb spiral!
I can’t pretend to know much about permaculture, but building an herb spiral is a project I’ve wanted to tackle for a long time. It’s a way to pack lots of garden space into a smaller footprint, creates microclimates for different herbs, and I love the aesthetic.
Not too long go we were lucky to have the use of a truck for the weekend, and managed to make it happen. (It’s amazing how easy it is to get a project like this done when you don’t have to work out how to transport 60 pounds of gravel by bicycle.) Here’s how we did it:
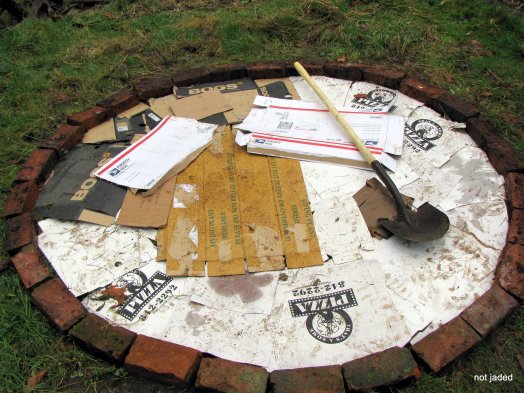
Step 1: Create the outline and cover the area with cardboard. This is where it comes in handy to have roommates who work at a pizza place!
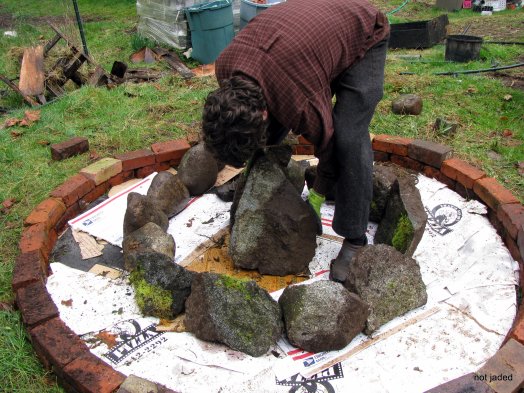 Step 2: Build the base for your spiral using sturdy rocks. As you carry said rocks across the yard, scoff at the idea of paying for a gym membership.
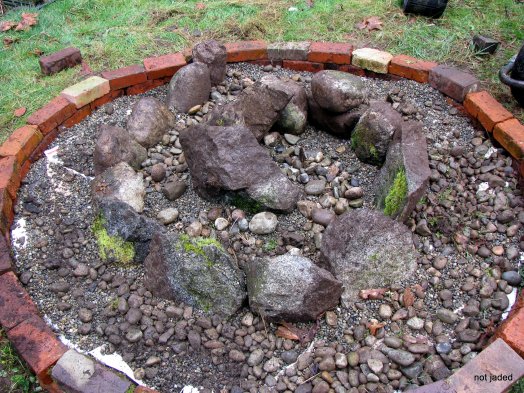 Step 3: Fill the base with gravel to help with drainage. We bought two bags of pea gravel (probably could have fit three) and supplemented with small rocks we pulled out of the garden–no shortage there!
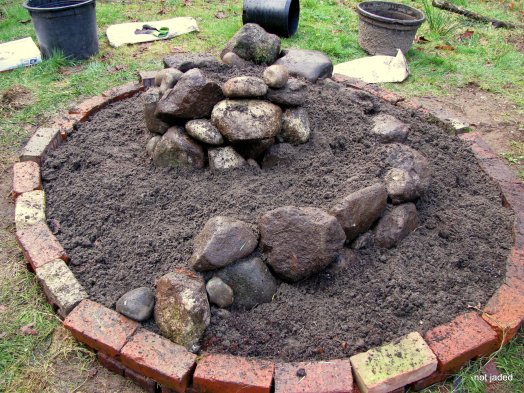 Step 4: Fill with soil, continuing to build up the spiral with more rocks as you cover the base layers. We got a little obsessive at this point about finding the perfect rocks for each little gap…
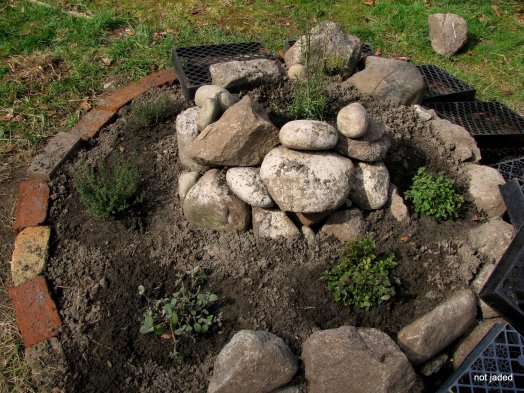 Step 5: Plant your herbs! Rosemary got the top spot, followed by oregano, sage and thyme. All of these plants moved here with us last November and waited out the winter and early spring in pots, so it felt good to get them in the ground. Continuing down the spiral, we direct seeded chamomile, cilantro, dill, and parsley. They’re starting to come up now, but in the photo you can see the plastic plant trays we used to keep the chickens from scratching up the seeds. Many of the instructions I saw online included mint, but we’re keeping ours in pots next to the spiral, so that they don’t take over.
Ironically, the main garden is now filled with self-seeded cilantro that is growing much faster than the stuff we planted in the spiral, but the sage and rosemary have never looked better! Next up, hugelkultur??
another recipe roundup
I’ve been working extra hours and things are getting very busy in the garden, but cooking is still my favorite way to unwind. Here’s what I’ve been making lately:
- Butternut Bean Soup. A simple white bean soup elegantly served in half a roasted butternut squash. The recipe is from Barbara Kingsolver’s Animal, Vegetable, Mineral and you can download a pdf here.
- Boston Baked Beans. I was inspired to make some after my mom was interviewed about our family’s bean lore for this Boston Globe article. I made a few tweaks to the family recipe–skipped the salt pork and cooked them in the slow cooker–and they were delicious! The leftovers were especially good on toast with a fried egg on top.
- Tahini Soup. Tahini is my favorite food, so I stock my freezer with this soup whenever I have an abundance of carrots. It’s a nice change of pace from the hearty soups I crave all winter.
- Carrot Millet Muffins. Thankfully, the abundance of carrots also led me to discover this recipe. The millet adds the most amazing crunch! I made three batches in as many weeks.
- West African Groundnut Stew. The days my shopping trips to PCC coincided with them serving this soup were always red letter days for sure. But thanks to Sundays at Moosewood, I can now make it at home. Sweet potatoes, hearty greens, and peanut butter–what’s not to love??
- Stinging Nettle Pesto. The stringy stems were a workout for my food processor, but this is my favorite way to eat nettles. It’s good on pasta, but is heavenly on grilled cheese. I use this recipe from Fat of the Land as a guideline, but substitute sunflower seeds for pine nuts to make it more affordable.
Sprouts!
I knew this would happen, but I may have jumped the gun with my post about signs of spring. Lately it’s felt like March is out to prove that it deserves that reputation for tempestuous weather. Pouring rain, snow, hail, sixty-degrees and sunny–we’ve had it all. Yet this time of year I’m suddenly haunted by the feeling that I should have gotten the whole garden planted yesterday. I think the reappearance of sunshine messes with my brain.
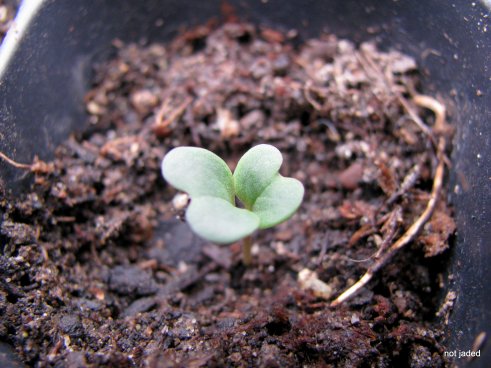
So anyway, you can bet that we planted our first sowing of peas on President’s Day. This was the first time I’ve been able to observe this Northwestern tradition because last year the ground was too soggy to break sod for our new garden until May. But this year, I was sure we’d be snacking on sugar snap peas by April. And then when the sprouts failed to appear, I was sure the seeds had rotted. What I hadn’t counted on was them taking a full month to germinate! Luckily, our farmstead includes a PVC tunnel-style greenhouse so I’ve been able to continue to satisfy my urge to plant things without risking spotty germination in cold soil.
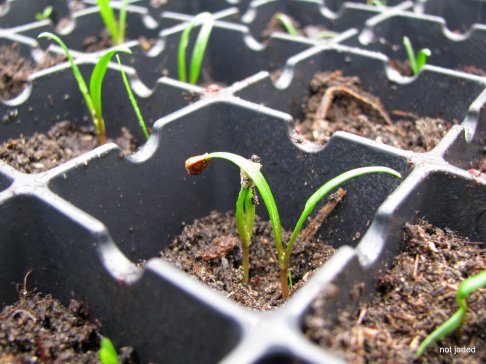
Having a greenhouse is a huge step up from the seed-starting setup we used last year, which involved sprouting seeds over a space heater and letting them jockey for light under a few CFLs on a sunny windowsill. But it’s still a learning experience. At first we tried to make our own seed-starting mix, but the quantities we need make sterilizing it in the kitchen impractical. And because the greenhouse wasn’t cleaned well at the end of last season, we’ve had some trouble with mold. But all setbacks aside, right now we have spinach, lettuce, kale, collards, broccoli, peppers, swiss chard, peas, and quinoa(!) going. And that’s not counting those President’s Day peas out in the garden or the arugula and lettuce we sowed under a cloche this past weekend. We still have a long way to go, but it’s a start…
This into that
I love leftovers, and since I lack the ability to cook in small batches, it’s a good thing that I do. If it’s not something I can freeze, I’ll dutifully eat the same dish for alternating lunches and dinners for days on end. Sometimes I’ll jazz it up with a fried egg
That said, I also like to read cookbooks, cooking blogs, etc., and especially ones about cooking sustainably, frugally, and simply. Unfortunately, the advice always seems to come down to: “First, you buy a whole chicken and roast it for Sunday dinner. Then, you use the meat in chicken tacos on Monday, chicken salad on Tuesday…” and so forth until you get down to soup made with chicken stock.
I’ve always found this type of advice less-than-useful for a couple of reasons, the most noteworthy of which being that I very rarely eat meat. I guess you could apply the same logic to beans, but I prefer to cook a big batch of dried beans and freeze most of it in smaller portions so that I always have a variety on hand. And when I do cook meat it’s not like I have any trouble using it up; it’s chicken–of course it can go in anything!
The leftovers that I need help using up are the odds and ends lurking in my fridge: the rice that outlived the curry, the half can of tomato paste, or the veggies on their way to to the compost pile. In this regard, there’s been some exciting alchemy happening in my kitchen lately:
- The French onion soup I posted about a few weeks ago left me with 3/4 of an increasingly stale baguette and a little bit of Gruyere. Obviously the cheese would have been delicious in anything, but the bread slowly turned to rock until one night I had the foresight to throw together this savory bread pudding from Macheesmo. It was perfect for a lazy weekend morning: Daniel popped it in the oven when he got up to let the chickens out, we continued to snooze* while it cooked, and within the hour our delicious breakfast was ready!
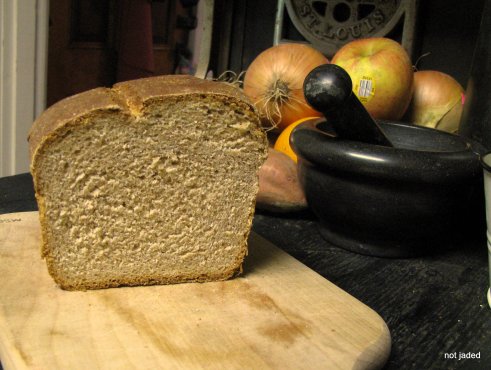
- And speaking of Daniel, he has a few specialties in the kitchen: anything breakfast-related (especially eggs Benedict), steak, bread, and torta di pasta. This last one is a fantastic way to use up leftover spaghetti and a great reason to always have a jar of sun-dried tomatoes on hand. The hardest part is waiting for it to cool to room temperature before eating!
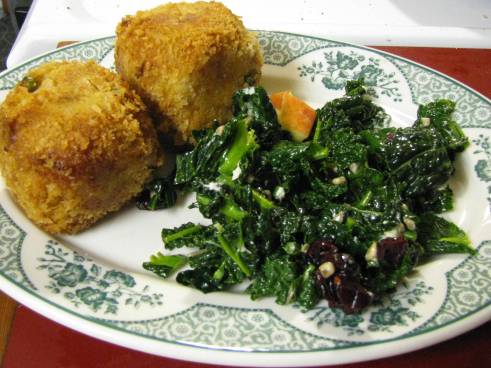
- But the leftover transformation that I’m proudest of is that of leftover risotto to arancini. I’ve always known these fried rice balls were one of my dad’s favorite North End treats, but until we made them I had never tried one because the ones he likes have meat in them. We stuffed ours with mozzarella and dipped them in marinara sauce, but I can’t wait to try more variations in the future. A massaged kale salad on the side rounded out the meal nicely.
The only downside to turning leftovers into something even better than the original dish? You’re a lot less likely to have leftovers…
*Hi, dad! I’m sure this part about us sleeping while the oven was on screamed “fire hazard!” to you. So I should clarify that although I slept soundly during the entire process, Daniel was alert enough to make sure the house didn’t burn down.

